
Replace a terminal
Swap a faulty terminal for a new one, and send the old one back.
Step 1: Reset the old terminal
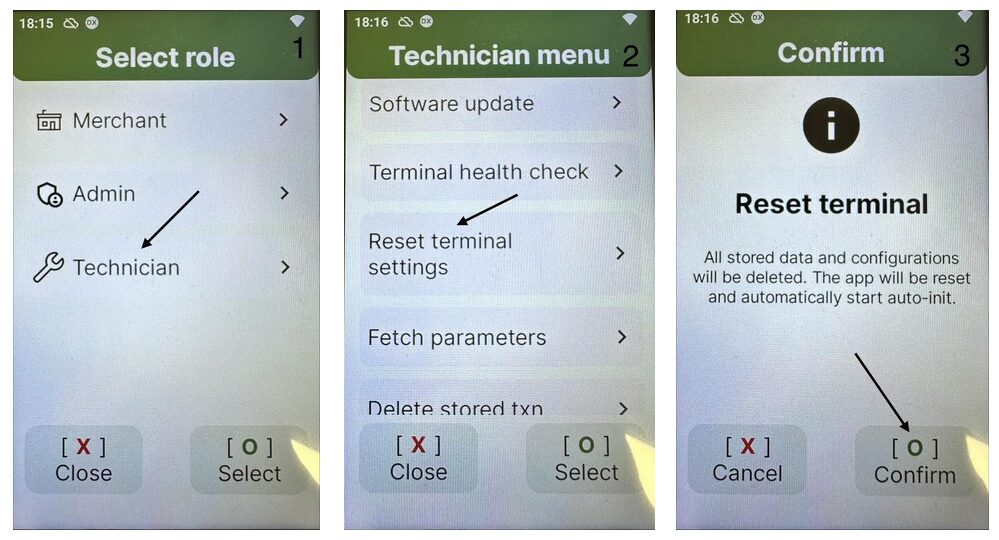
If the old terminal still responds, open the Technician menu and select Reset terminal settings.
Never delete offline transactionsIf the terminal has stored (offline) transactions, it asks you to delete them before the reset. Don't. Select Send stored transactions in the same menu first, then try the reset again. If sending fails, return the terminal without resetting it.
When the terminal shows the Auto-init menu, don't continue. Disconnect it from the ECR and from power.
Step 2: Replace it in the Aera Portal
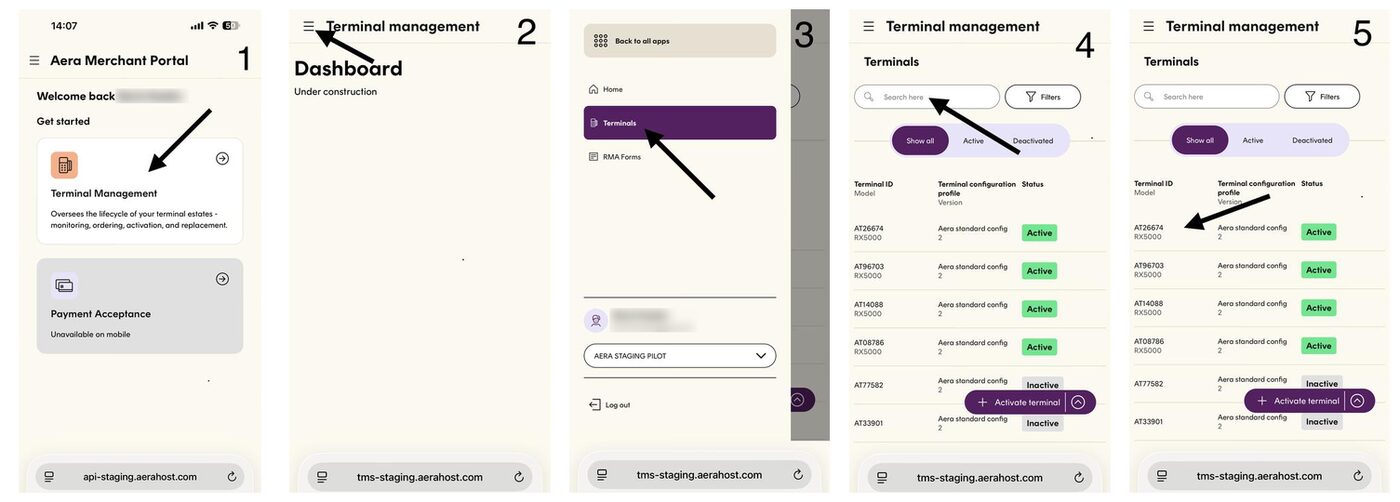
- Go to Terminal management › Terminals and find the old terminal. You can search by the serial number on its back.
- Select it, then select Replace terminal.
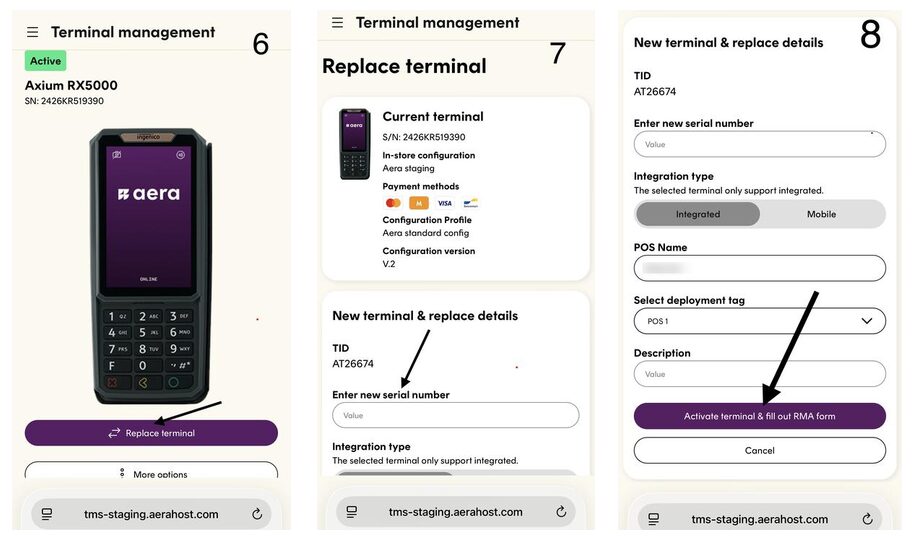
- Enter or scan the serial number of the new terminal.
- Select Activate terminal & fill out RMA. Aera creates a new terminal ID and activates it on the new terminal.
See also Replace terminal.
See the screens: replace in the Aera Portal
Step 3: Fill in the return form
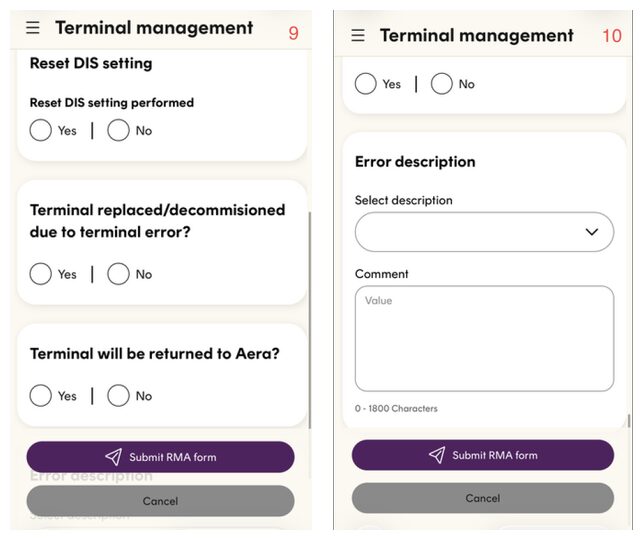
Fill in the RMA form, every time you return a terminal, also when nothing is wrong with it, for example when a store closes. Under Error description, describe the problem as well as you can. "Reset DIS settings" in the form means the reset in step 1.
A terminal without faults can be used again later.
Step 4: Connect the new terminal
Mount and connect the new terminal, get it ready and test it, as in Install a terminal, steps 3 to 7. Always make a test payment before you leave.
Step 5: Send the old terminal back
Pack the old terminal securely and send it to your designated warehouse.
Updated 10 days ago