
Install a new terminal
Order and activate a terminal ID, connect the terminal, update it and get it ready for payments.
Check Before you go on site first.
Step 1: Order a terminal ID
Skip this step if the merchant has already ordered the terminal IDs for the store.
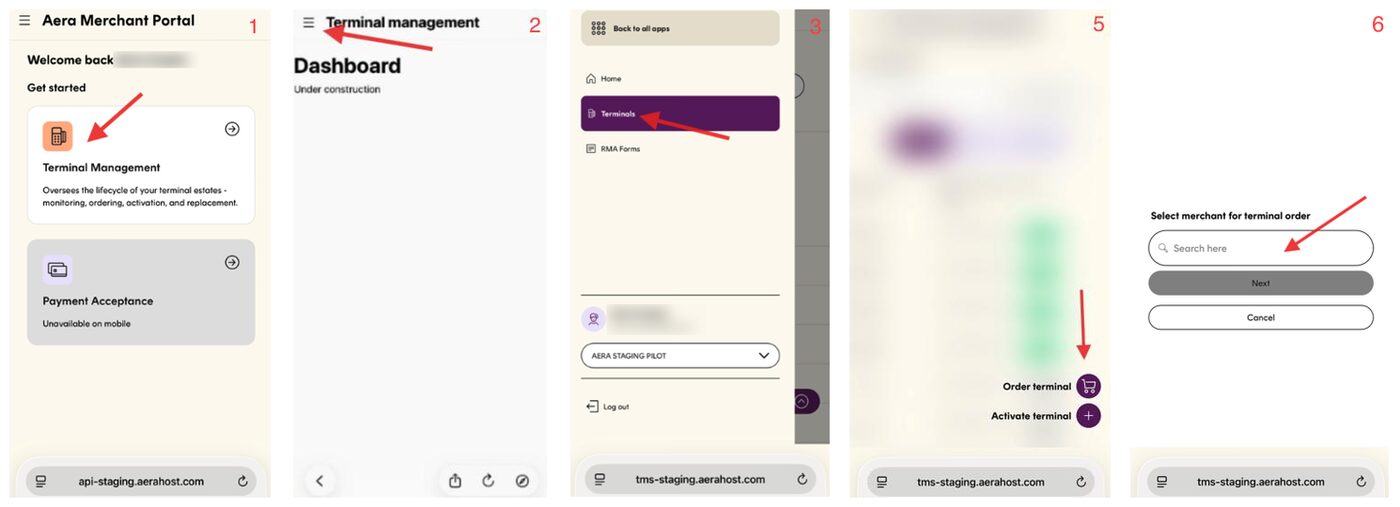
In the Aera Portal, order a terminal ID for the store. See Order terminal.
Choose the right config profileA customer or chain can have several config profiles. Make sure you add the right one to the cart.
See the screens: order a terminal ID
Step 2: Activate the terminal ID
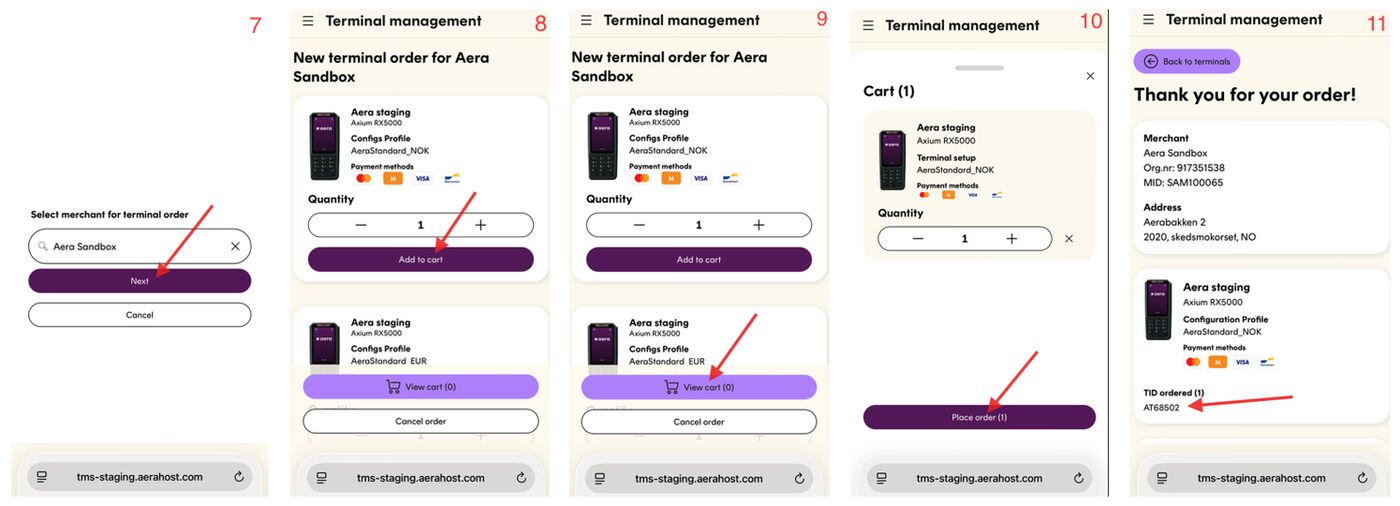
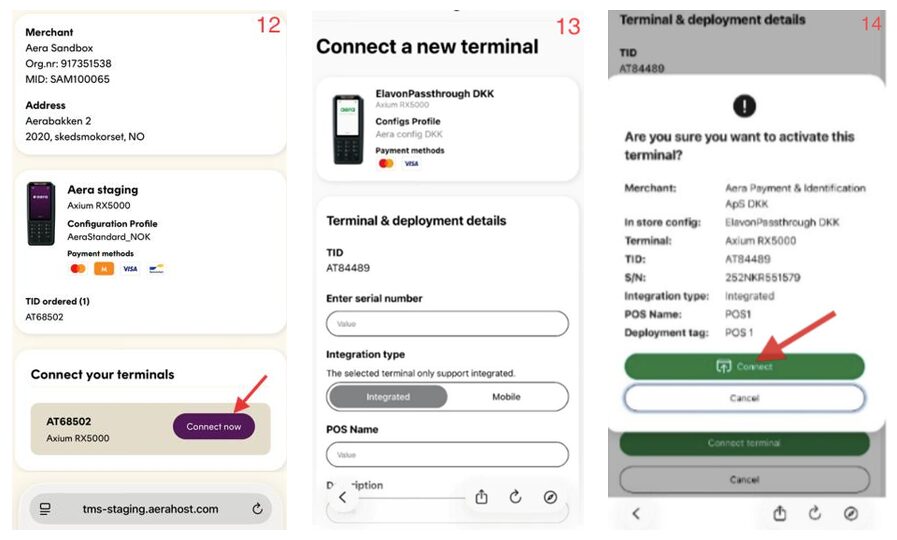
Right after ordering, select Connect now, or go to Terminals › Activate terminal. See Activate terminal. Fill in:
| Field | What to enter |
|---|---|
| Serial number | Scan it from the back of the terminal |
| Integration type | Integrated if the terminal talks to the ECR. Otherwise Mobile |
| POS name | The cash register's name or number, following the merchant's naming, for example Register1 or SCO1 |
| Description | Leave it empty, unless you've agreed to use it |
| Deployment tag | POS1 to POS5, matching cash register 1 to 5. Tag terminal 6 and up as POS5 |
Select Connect to confirm. To activate more terminals, select Connect new.
See the screens: activate the terminal ID
Prepare terminals before you travel
You can order and activate terminal IDs before you go to the store, and connect the terminals in a warehouse to download software. You then have to break the security seal and put on a new one.
Step 3: Mount and connect the terminal
Mount the terminal where the merchant agreed. Keep contactless terminals at least about 30 cm apart, and fit the privacy shield if it came as an accessory. See Protect PIN entry.
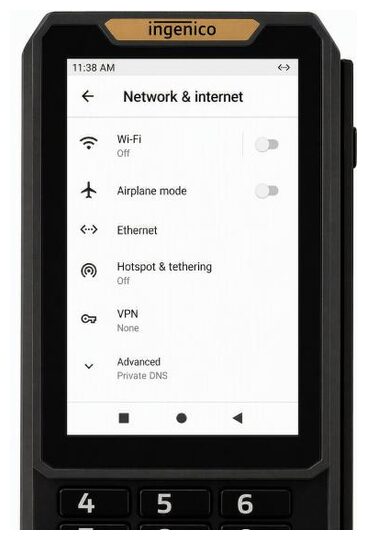
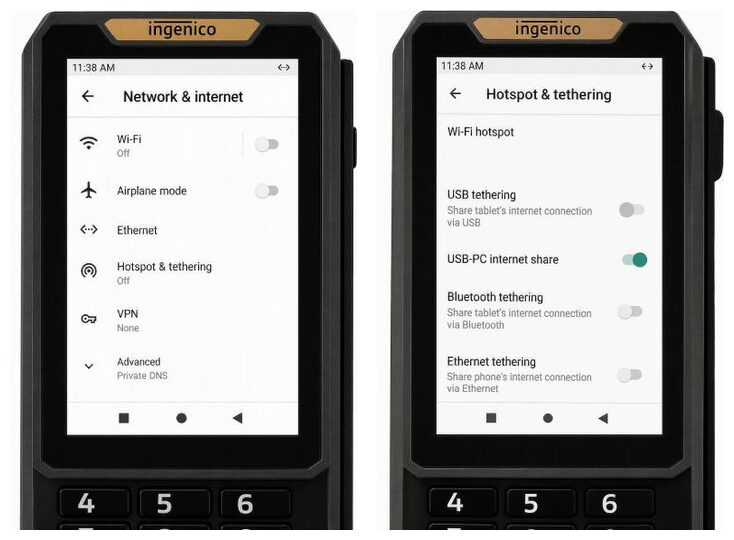
The terminal connects by Ethernet or USB. In the Android menu (the gear icon, swipe right if you don't see it), open Network and Internet and choose the connection type. The Android menu needs a technician password.
- Connect the Ethernet cable.
- Open the Android menu.
- Check that Wi-Fi is off.
- Select Network and Internet › Ethernet. You find the MAC address here. DHCP is on by default.
- Check that the terminal gets an IP address from the network.
- Connect the USB cable to the ECR.
- Open the Android menu › Network and Internet › Hotspot & tethering.
- Check that USB-PC internet share is on.
Hotspot & tethering can still show as off on the screen before. That's only the display: the connection works. See also IP over USB.
Step 4: Update the terminal
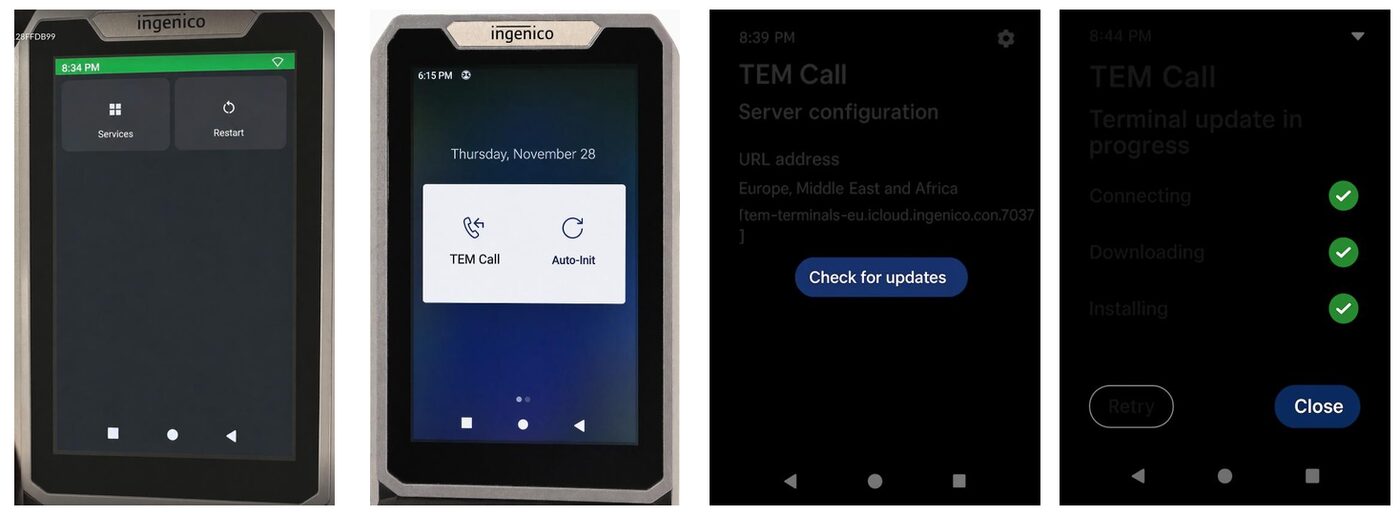
- Press OK and . (period), then select Services.
- Start TEM call, then select Check for updates.
- Select Close when all checkmarks are green.
Step 5: Open the Aera app
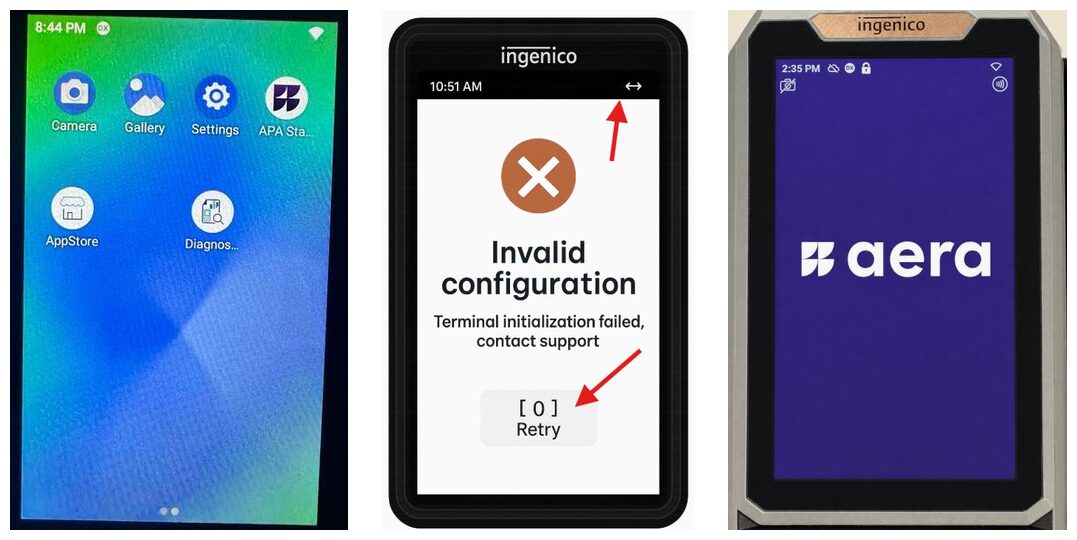
- Open the Aera app (the purple icon). The terminal restarts. Open the app again if it doesn't open by itself.
- If the terminal doesn't restart, hold down the yellow button and . (period) to force a restart.
If the terminal shows a connection message, it hasn't reached the ECR or the network yet. Wait until you see <-> in the top right corner, then select Retry. An exclamation mark means the terminal is still offline.
The terminal is ready when the Aera app shows its start screen.
Step 6: Check the time zone
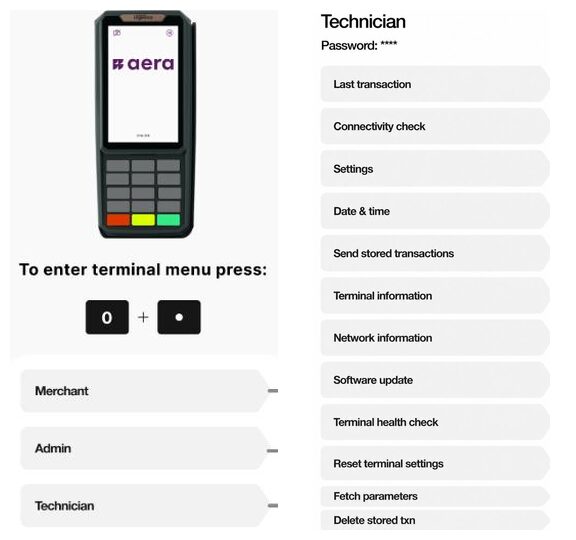
Check that the terminal shows local time. If not, go to the menu › Technician › Date/time › Time zone › Region, and set your region. Both steps need technician passwords.
Step 7: Test the terminal
- Check that the terminal has the right configuration for the store.
- Make a test payment from the ECR.
- Refund it, if the ECR supports refunds.
If the payment fails, check the connection first. See Check the connection.
Step 8: Hand over to the store
- Show the store manager the basics: taking a payment, the menu and checking the last transaction.
- Hand over Operate terminals and Security checks and cleaning.
The terminal is now ready for use.
Updated 10 days ago